Generate SDKs from OpenAPI
This page documents using the Speakeasy CLI to generate SDKs from OpenAPI / Swagger specs.
For a more UI-based experience, use the Speakeasy app:
Install the Speakeasy CLI
After signing up, install the Speakeasy CLI using one of the following methods:
For manual installation, download the latest release from the releases page , extract the binary, and add it to the system path.
Speakeasy Quickstart
For first-time SDK generation, run speakeasy quickstart.
speakeasy quickstartAuthentication & account creation
The CLI will prompt for authentication with a Speakeasy account. A browser window will open to select a workspace to associate with the CLI. Workspaces can be changed later if required.
If you’ve not previously signed up for an account, you will be prompted to create one.
New accounts start with a 14 day free trial of Speakeasy’s business tier, to enable users to try out every SDK generation feature. At the end of the trial, accounts will revert to the free tier. No credit card is required.
Free accounts can continue to generate one SDK with up to 50 API methods free of charge. Please refer to the pricing page for update information on each pricing tier .
Upload an OpenAPI document
After authentication, the system prompts for an OpenAPI document:
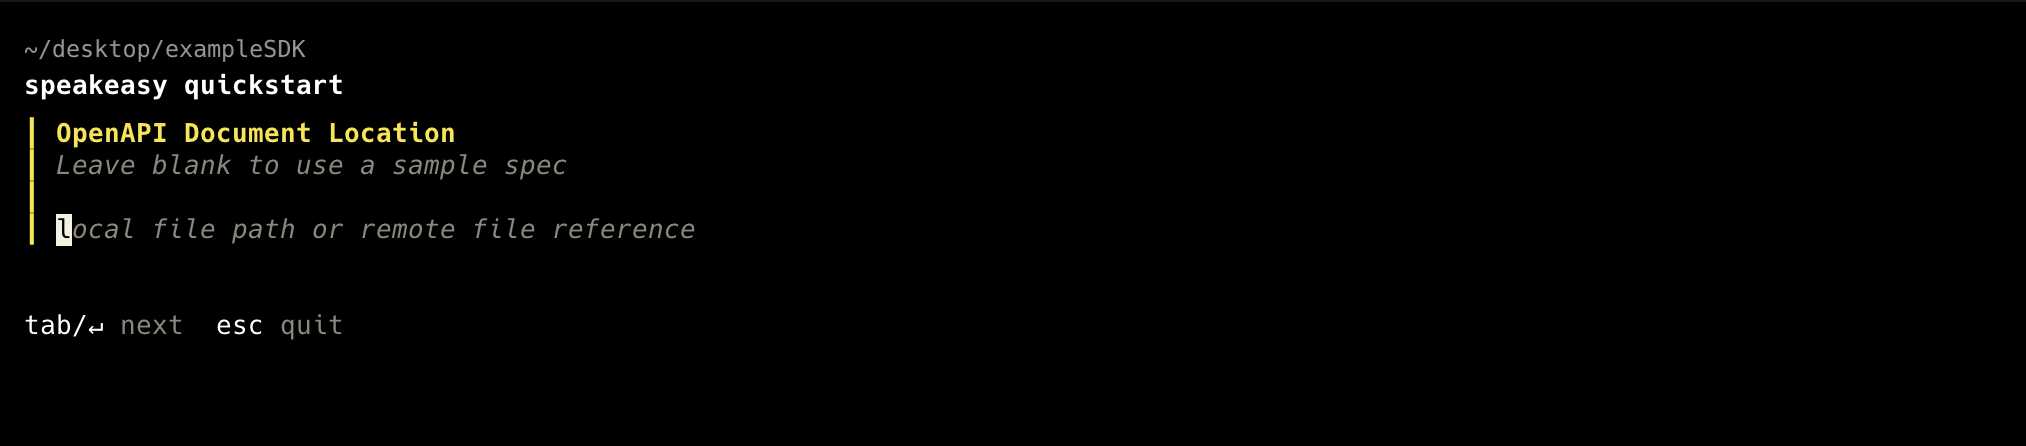
Provide either a link to a remote hosted OpenAPI document, or a relative path to a local file in one of the supported formats:
Tip
If the spec is in an unsupported format, use one of the following tools to convert it:
- Swagger 2.0 -> OpenAPI 3.0 : go to Edit > Convert to OpenAPI 3.0
- Postman -> OpenAPI 3.0
Select artifact type
After configuring the OpenAPI document, the next step prompt is to choose the type of artifact being generated: SDK or MCP. Select SDK, and a prompt will appear to choose the target language: Choosing Terraform will default you back to the CLI native onboarding. Editor support for Terraform previews coming soon.
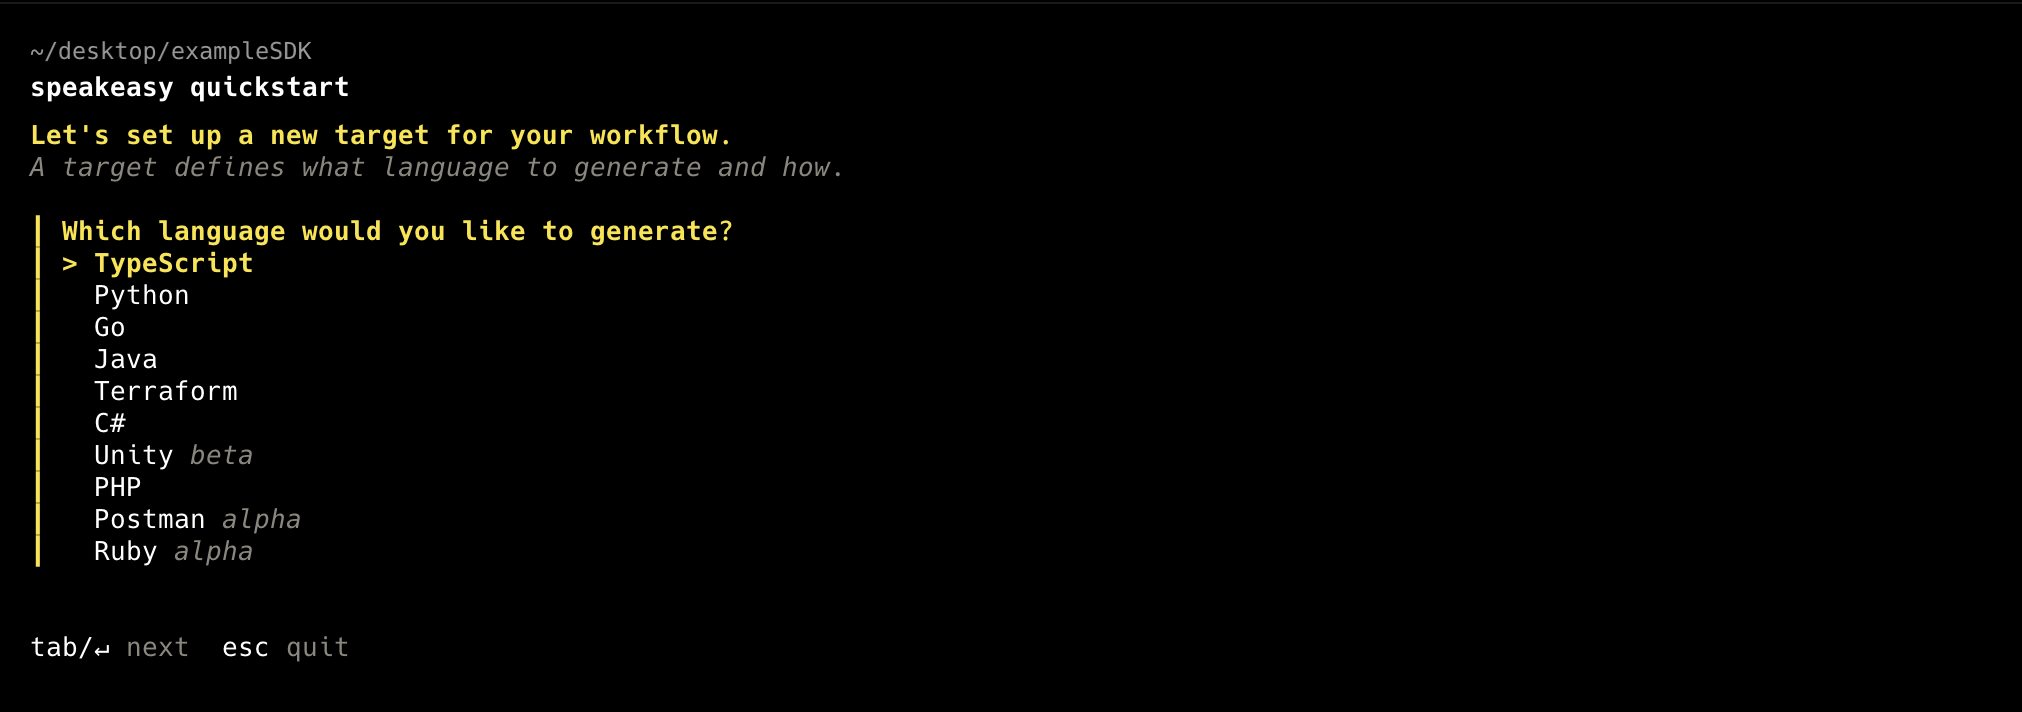
For each language, Speakeasy has crafted generators with language experts to be highly idiomatic. Follow the links below for all the details on the design decisions that have gone into each language we support:
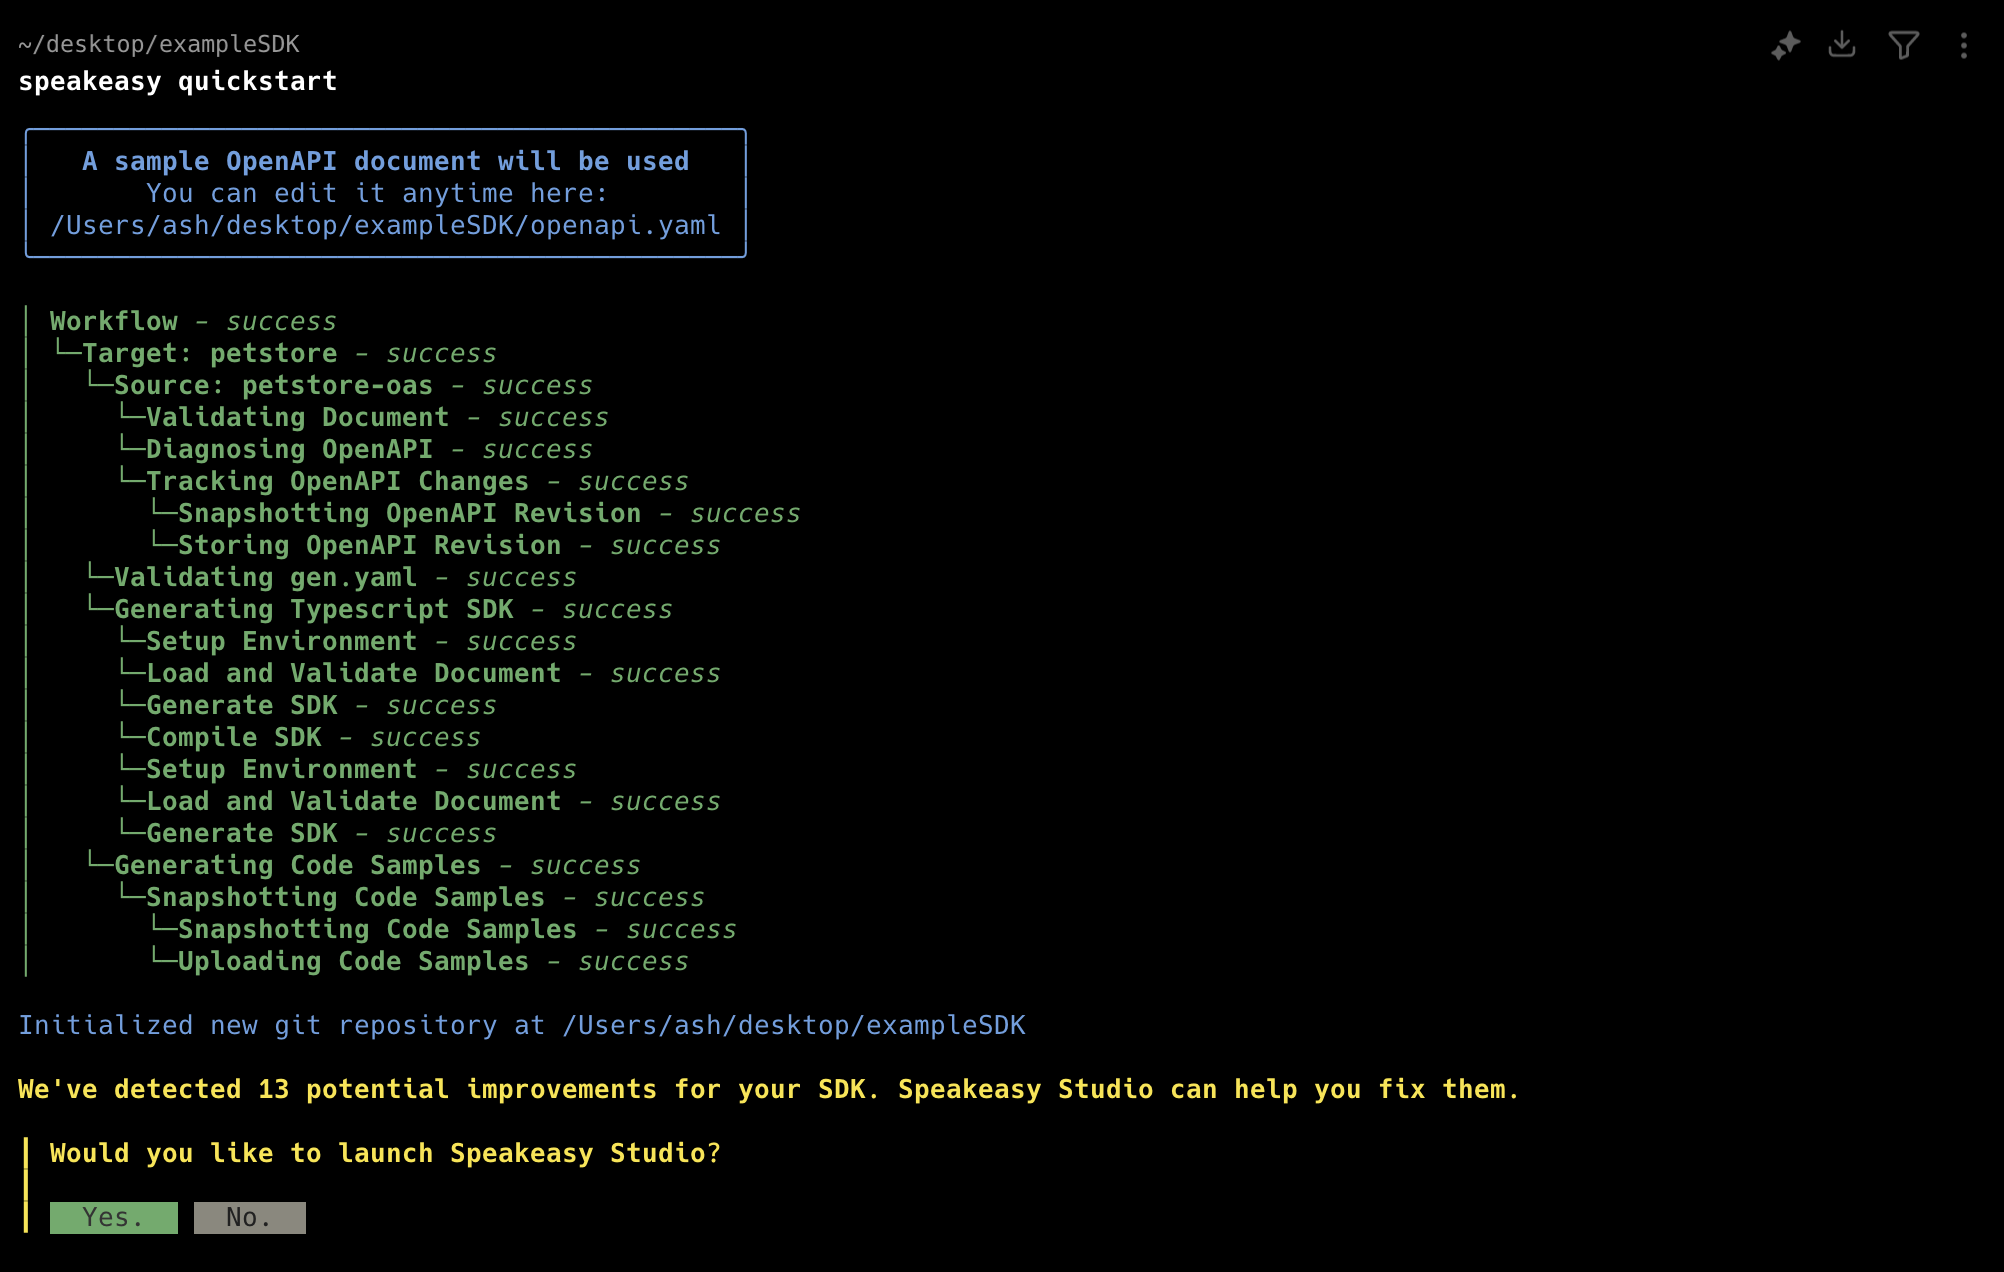
Complete the SDK configuration
Speakeasy validates the specifications and generates the SDK after receiving all inputs. The process executes speakeasy run to validate, generate, compile, and set up the SDK. A confirmation message displays the generated SDK details upon successful completion:
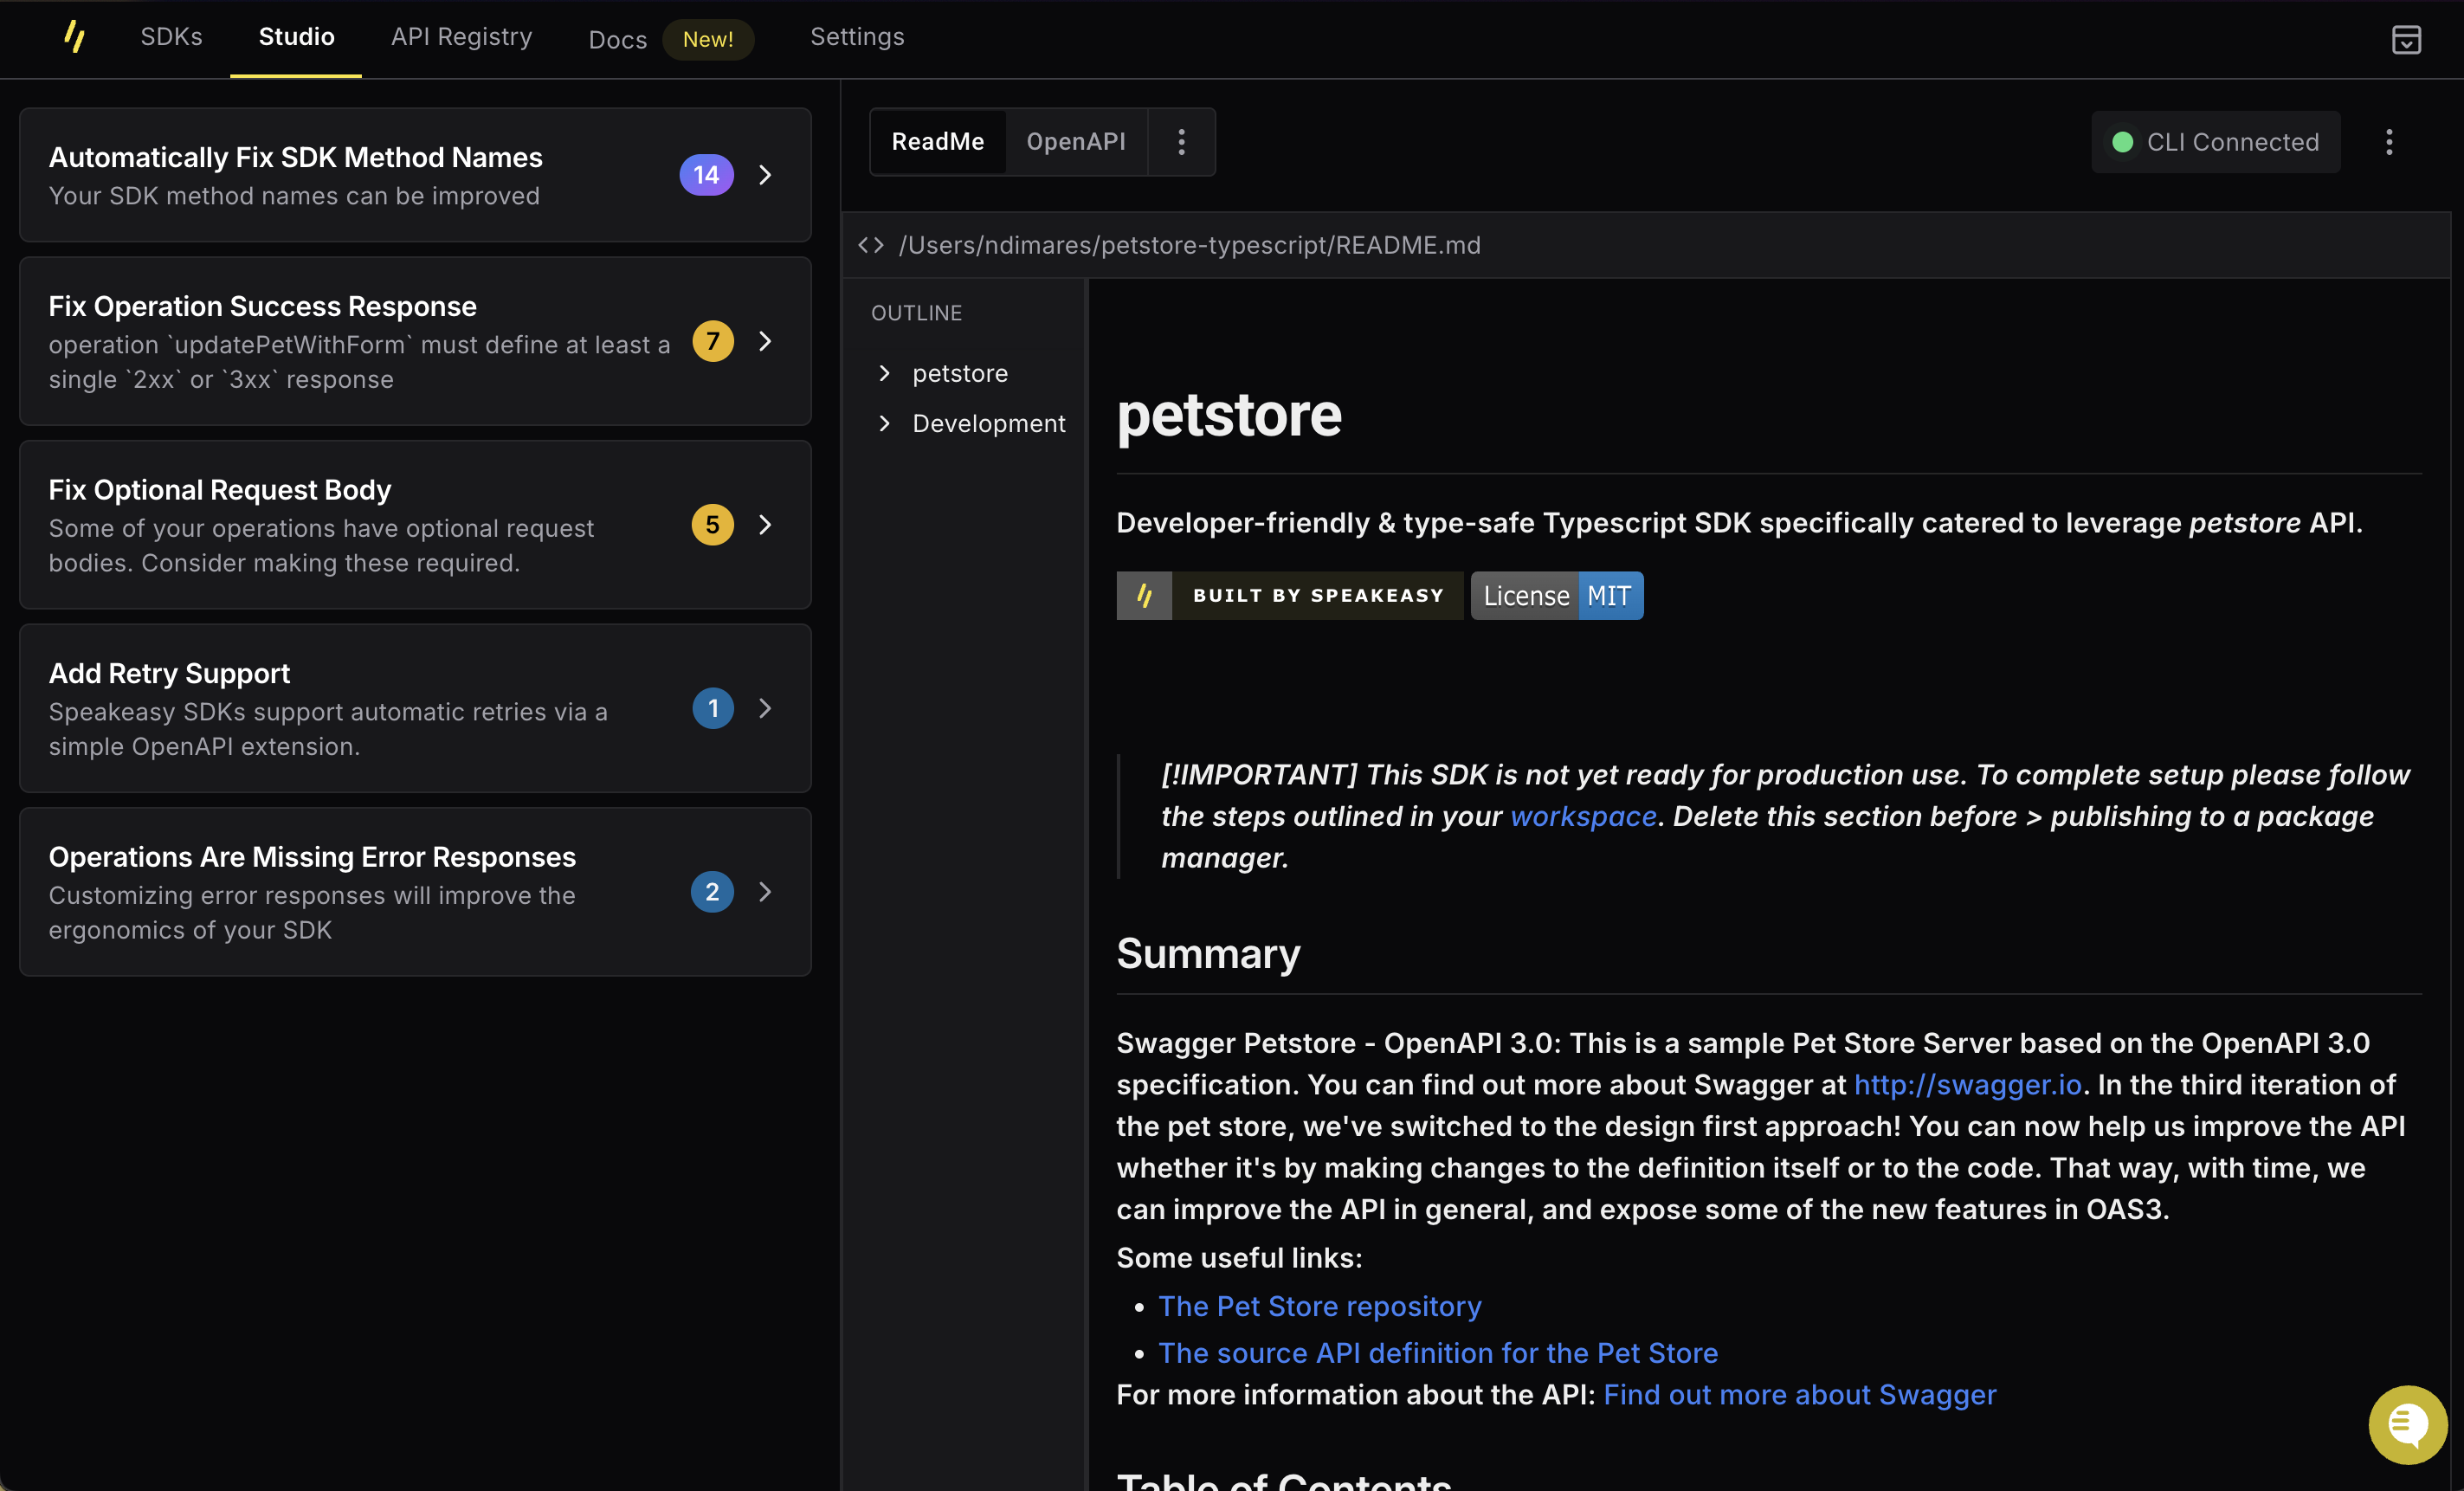
Iterating on the SDK with Studio
If the SDK is successfully generated, there will be a prompt asking the user to open the SDK studio. The Studio is a web GUI that helps users make look & feel improvements to their SDKs. It uses OpenAPI Overlays to preserve the original OpenAPI specification while allowing users to make changes to the generated SDK.
Saved changes in the Studio automatically triggers a regeneration of the SDK locally.
It is also possible to make changes without the Studio. Check out the following guide on customizing SDKs for all the details.
Next Step: Uploading the SDK to GitHub
Once the SDK is ready, upload it to GitHub by following the Github setup guide
Last updated on