Set up SDK on GitHub
The Speakeasy CLI
- Downloading or loading the OpenAPI document from a URL or repository.
- Validating the OpenAPI document.
- Generating SDKs for multiple languages.
- Committing the generated SDKs to the repository or opening a pull request (PR).
Warning
Branches and pull requests created by the GitHub action are owned by it. Any future generations (whether scheduled or manually triggered) will overwrite all changes in that branch/PR. To make changes to the generated code, create a separate PR instead of modifying the action-generated PR.
Example workflow file
name: SDK Generation
permissions:
  checks: write
  contents: write
  pull-requests: write
  statuses: write

on:
  workflow_dispatch:
    inputs:
      force:
        description: Force SDK generation, even if no changes are detected.
        type: boolean
        default: false
      runs-on:
        description: Runner to use for the workflow (e.g., large-ubuntu-runner)
        type: string
        default: ubuntu-latest

jobs:
  generate:
    uses: speakeasy-api/sdk-generation-action/.github/workflows/workflow-executor.yaml@v15
    with:
      speakeasy_version: latest
      force: ${{ github.event.inputs.force }}
      mode: pr
      runs-on: ${{ github.event.inputs.runs-on }}
    secrets:
      github_access_token: ${{ secrets.GITHUB_TOKEN }}
      speakeasy_api_key: ${{ secrets.SPEAKEASY_API_KEY }}
Step-by-step guide
Initialize the SDK repository
Create a new GitHub repository to host the autogenerated SDKs. It is recommended to use a separate repository for each SDK, but a monorepo is also supported.
Generate the SDK workflow configuration
Run the Speakeasy CLI to configure the SDK generation workflow. This command creates the necessary workflow files.
speakeasy configure githubAfter running the command, .speakeasy/workflow.yaml and .github/workflows/sdk_generation.yaml will be created. These files define the SDK generation workflow and the associated GitHub Action.

If further customization is needed, manual configuration of the workflow files is available.
Set up GitHub secrets
Configure GitHub secrets for authentication:
- Navigate to Settings > Secrets & Variables > Actions in your GitHub repository.
- Add a new secret named
SPEAKEASY_API_KEYwhich can be obtained from the Speakeasy dashboard.
Push the workflow to GitHub
Commit and push the generated workflow files to the repository. To test the GitHub Action without modifying any GitHub branches, put the action into mode: test.
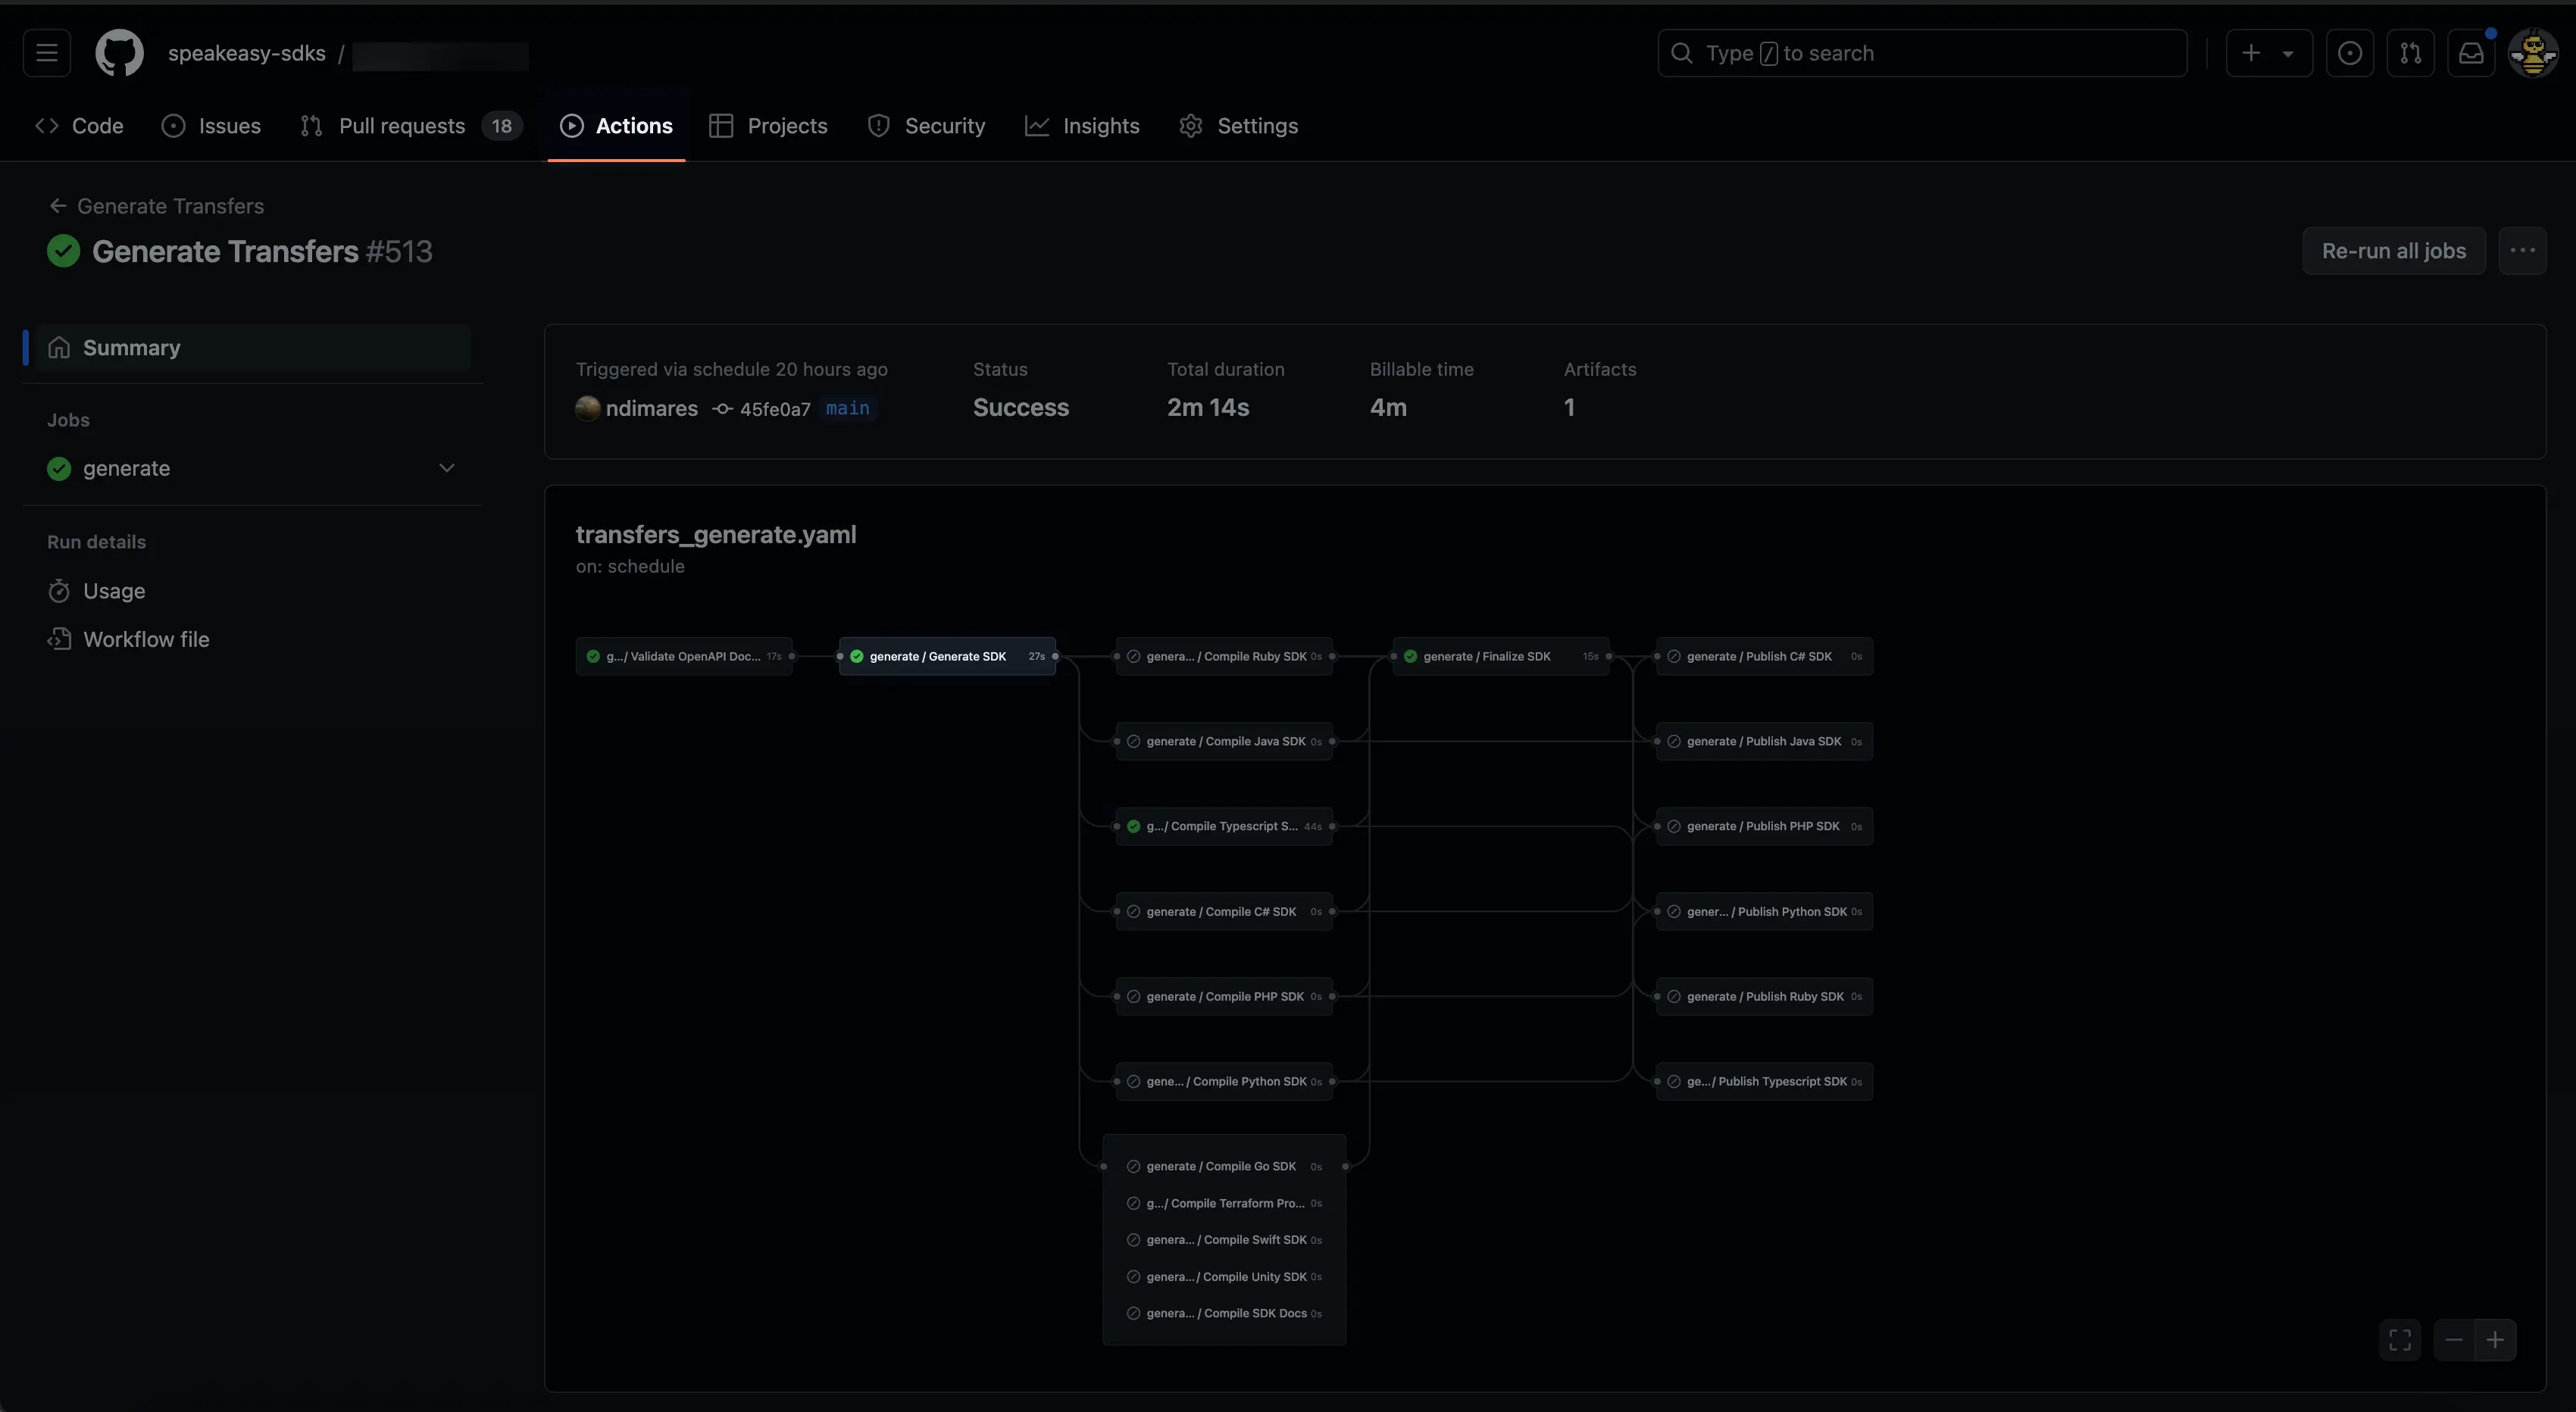
Navigate to Actions in the GitHub repository to trigger the SDK generation workflow manually or wait for it to run automatically. A green checkmark indicates successful workflow completion. If the publishing step has not been configured, it will be skipped.

For details on package publishing, refer to the Publishing SDKs guide.
Update the GitHub Actions workflow permissions
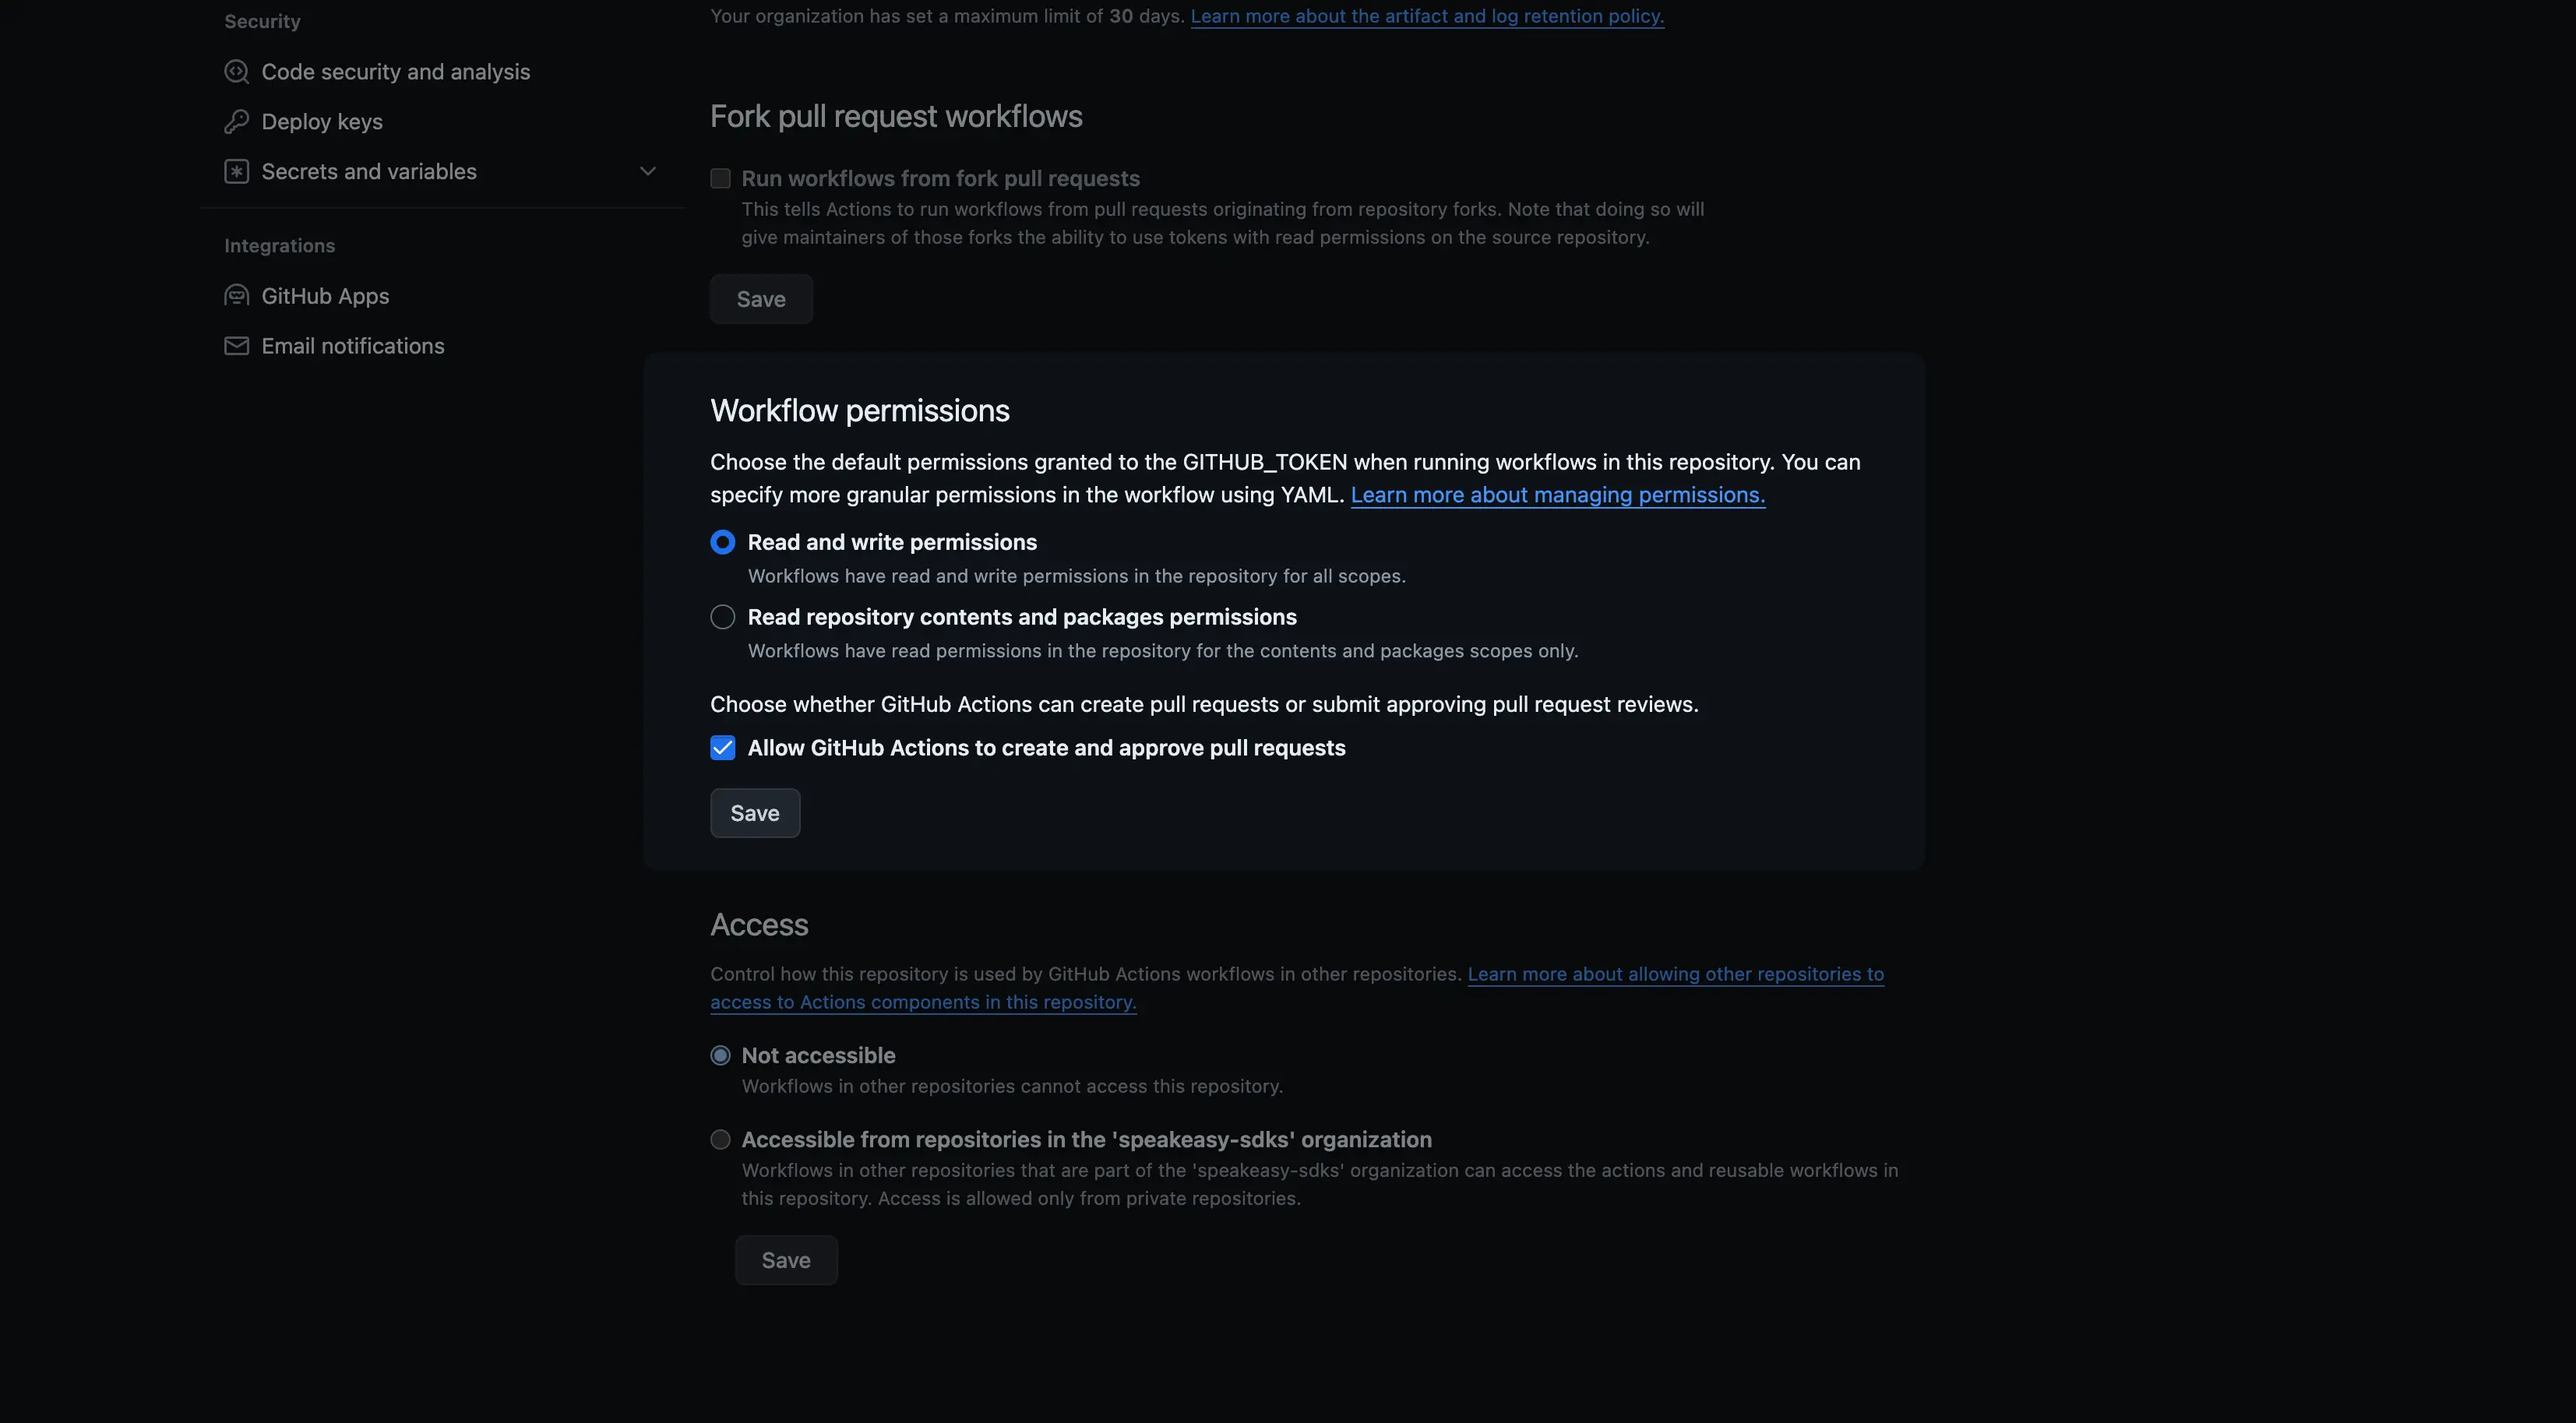
If the error 403 GitHub Actions is not permitted to create or approve pull requests occurs, the repository’s GitHub Actions permissions must be updated.
Navigate to Settings > Actions > Workflow permissions and adjust the permissions accordingly.

Configure remote URLs for schemas
Warning
Remote URLs for OpenAPI schemas must remain stable. Dynamically constructed URLs in workflow files are not supported.
If the OpenAPI schema is hosted in another repository or at a remote URL, set the source as the remote URL in .speakeasy/workflow.yaml. Use the following command to add the remote URL:

If the remote URL requires authentication, follow the prompts to provide a token or key stored as an environment variable (for example, $OPENAPI_DOC_AUTH_TOKEN).

Important: When fetching OpenAPI documents from private repositories, ensure that you prefix the token value with Bearer when setting the value. For example:
OPENAPI_DOC_AUTH_TOKEN="Bearer <TOKEN_VALUE>"Add a GitHub secret Bearer prefix for private repositories).
Using larger GitHub-hosted runners
For resource-intensive SDK generation builds (such as large TypeScript projects that fail during compilation due to memory constraints), you can configure larger GitHub-hosted runners with more RAM and CPU resources.
Set up larger runners
-
Configure larger runners in your GitHub organization: Larger runners are not enabled by default and require separate billing setup.
- Follow the GitHub documentation for managing larger runners
- Choose a runner size with sufficient RAM (standard
ubuntu-latestrunners have only 7GB RAM) - Assign a custom label to your larger runner (e.g.,
large-ubuntu-runner)
- Follow the GitHub documentation for managing larger runners
-
Update your workflow: Once your larger runner is configured, update your workflow file to use the custom runner label:
name: SDK Generation
permissions:
  checks: write
  contents: write
  pull-requests: write
  statuses: write

on:
  workflow_dispatch:
    inputs:
      force:
        description: Force SDK generation, even if no changes are detected.
        type: boolean
        default: false
      runs-on:
        description: Runner to use for the workflow (e.g., large-ubuntu-runner)
        type: string
        default: large-ubuntu-runner # Use your custom label here

jobs:
  generate:
    uses: speakeasy-api/sdk-generation-action/.github/workflows/workflow-executor.yaml@v15
    with:
      speakeasy_version: latest
      force: ${{ github.event.inputs.force }}
      mode: pr
      runs-on: ${{ github.event.inputs.runs-on }}
    secrets:
      github_access_token: ${{ secrets.GITHUB_TOKEN }}
      speakeasy_api_key: ${{ secrets.SPEAKEASY_API_KEY }}
This configuration allows you to specify different runner types when manually triggering the workflow, or set a default larger runner for all builds.
Enable signed commits
To include signed commits from the SDK Generation workflow, add signed_commits: true to the workflow file. This configuration ensures that GitHub Actions creates verified commits during workflow execution.
name: SDK Generation
permissions:
  checks: write
  contents: write
  pull-requests: write
  statuses: write

on:
  workflow_dispatch:
    inputs:
      force:
        description: Force SDK generation, even if no changes are detected.
        type: boolean
        default: false
      runs-on:
        description: Runner to use for the workflow (e.g., large-ubuntu-runner)
        type: string
        default: ubuntu-latest

jobs:
  generate:
    uses: speakeasy-api/sdk-generation-action/.github/workflows/workflow-executor.yaml@v15
    with:
      speakeasy_version: latest
      force: ${{ github.event.inputs.force }}
      mode: pr
      runs-on: ${{ github.event.inputs.runs-on }}
      signed_commits: true
    secrets:
      github_access_token: ${{ secrets.GITHUB_TOKEN }}
      speakeasy_api_key: ${{ secrets.SPEAKEASY_API_KEY }}
Last updated on