Integrate Speakeasy with Mintlify
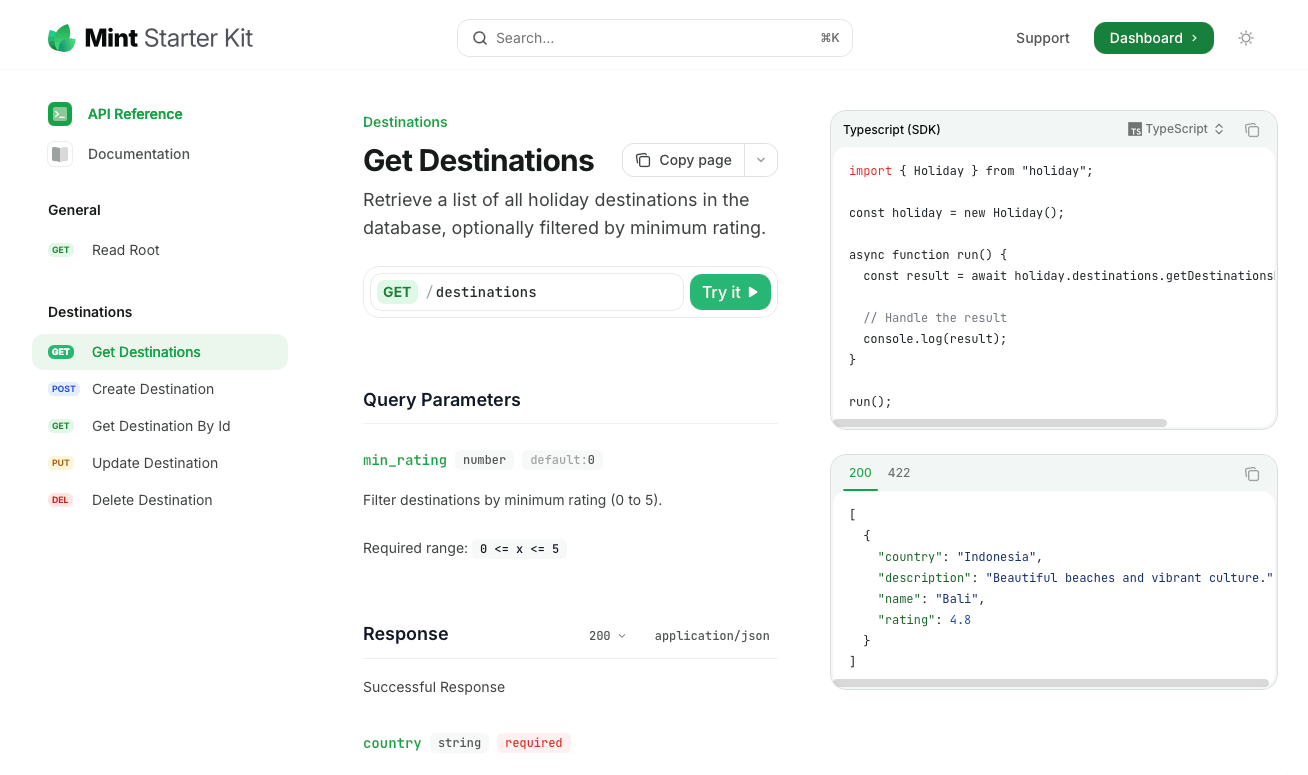
Autogenerated code snippets from Speakeasy SDKs can be integrated directly into Mintlify API reference documentation. SDK usage snippets are shown in the interactive playground of Mintlify-powered documentation sites.
Prerequisites
To integrate Mintlify with Speakeasy, you’ll need the following:
- A Mintlify documentation repository .
- A Speakeasy-generated SDK with a configured automated code sample URL.
Setting up the integration
Get the API’s combined spec public URL from the registry
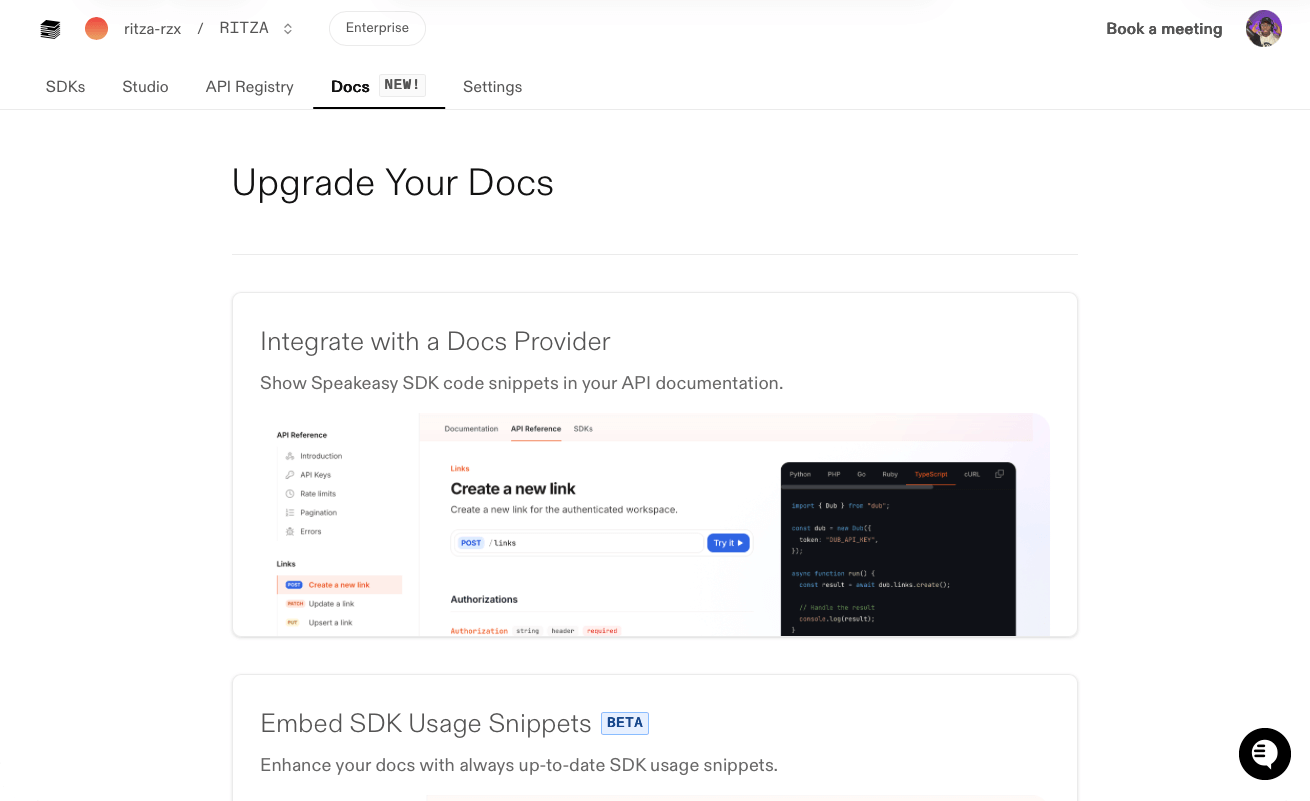
Navigate to the Speakeasy Dashboard and click on the Docs tab. Select the Integrate with a Docs Provider option.
On the Integrate with a Docs Provider page, select the correct OpenAPI document using the Change OpenAPI Documents button. Then, copy the Spec URL.
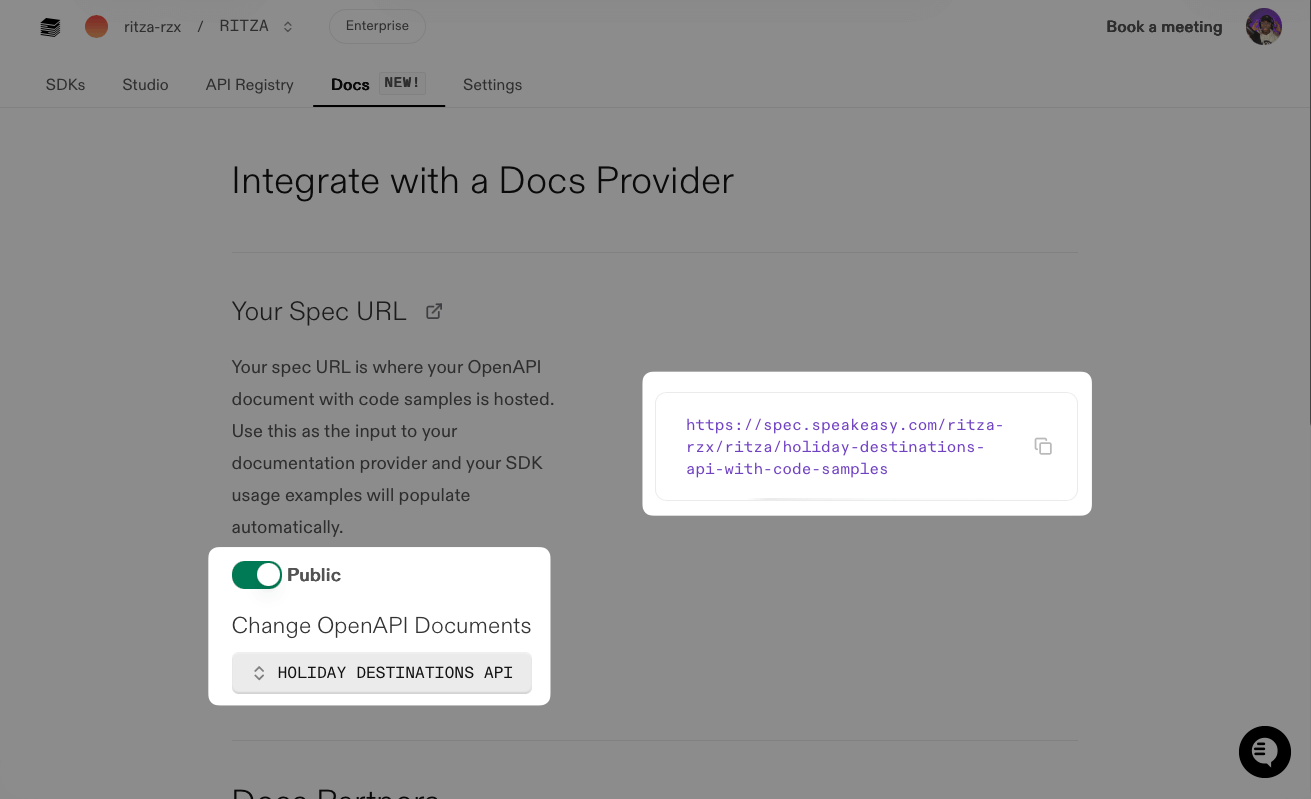
Make sure the Public toggle is enabled, so Mintlify can access the OpenAPI document.
Update the configuration file
Add the combined spec URL to Anchors or Tabs in the docs.json configuration file of a Mintlify repository.
Using docs.json
Add the combined spec URL to Anchors by updating the anchor field in the docs.json file as follows:
{
  "anchors": [
    {
      "name": "API Reference",
      "url": "api-reference",
      "icon": "square-terminal",
      "openapi": "SPEAKEASY_COMBINED_SPEC_URL"
    }
  ]
}
Add the combined spec URL to Tabs by updating the tab field in the docs.json file as follows:
{
  "tabs": [
    {
      "name": "API Reference",
      "url": "api-reference",
      "openapi": "SPEAKEASY_COMBINED_SPEC_URL"
    }
  ]
}
Migrating from mint.json
If you’re using the legacy mint.json configuration file, upgrade to docs.json using the Mintlify CLI:
mint upgradeThis command creates a docs.json file from your existing mint.json. After verifying the configuration, delete the old mint.json file.
Speakeasy-generated code snippets can now be viewed in the Mintlify API reference documentation. See the code snippets in action in the interactive playground of the Mintlify-powered documentation site.
Next steps
Mintlify offers flexible customization options for API references generated from OpenAPI documents. For more information, refer to the Mintlify documentation .
Last updated on